This article shows you how to create and send personalized site messages to your contacts.
Take note
This feature requires Site Tracking. You must whitelist your website on the Website > Tracking page in your ActiveCampaign account. Read our Overview of Site Tracking and Set up Site Tracking articles for information on how to complete this step.
What are site messages?
Site messages are lightweight notifications that appear on your website. These messages are sent with the “Send a site message” automation action. You can display the site message to all contacts who encounter this step in your automation, or a segment of those contacts.
Site messages are not shown to:
- Anonymous users
- Contacts who do not enter/do not encounter this action in your automation
Site messages are displayed first as an “Initial Message” at the bottom-right corner of your website. This position is defined globally. However, you can adjust where they appear for your contacts. Any change you make to the position of one site message will affect the rest of your messages.
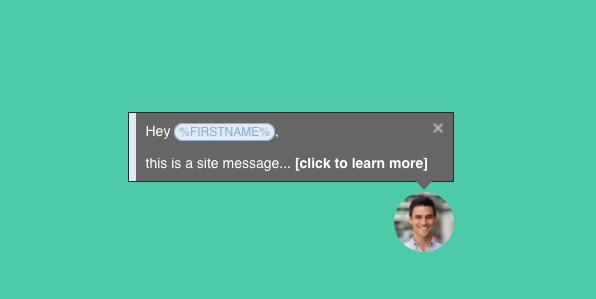
An “initial” site message expands into a “detailed message” when a contact clicks on it. You can customize the appearance of both messages. You can also use personalization tags to refer to contacts by their first name or display other contact-specific information, such as dates, geographic information, contact fields, and ecommerce deep data.
Sending a site message
Once a contact encounters the “Send a site message” action in your automation, the site message is queued to be displayed to them. The next time the same contact visits your site, the site message is displayed.
Create a site message
Site messages are sent with the “Send a site message” automation action. To set it up:
- Click Automations on the left menu.
- Click “Edit” for the automation you want to use or create a new automation.
- Click the node (+) where you would like the site message to be in the automation.
- Click the "Sending" tab and select the "Send a site message" option from the "Add an action" modal window.
- A modal window will appear. Complete the following;
- Message name - Click the dropdown and select an existing message name or create a new one. If creating a new one, use a clear name that describes your site message in a way that will make sense to you and your team in the future. The message name is not visible to contacts
-
Display on - Here, you can display the site message on any of your web pages or specific pages. To use either option, click “Edit” and choose “Any page on my website” or “Specific pages”
- If you selected “Specific pages,” use the fields to select your domain and add the subdomain of where your site messages should appear. You may use an asterisk character as a wildcard placeholder
- Click the “Add a new page” button to add more pages
- Click “Done” when finished
- Location - Select how and where the site message will appear for contacts. Click the “Edit” button, then use the dropdowns to select an effect and location for the site message. When finished, click “Done”
-
Design message - Click “Design message.” We will redirect you to a page where you can build your initial and detailed site messages
- Initial message:
- Choose a layout, theme, icon style, set background and foreground colors for the icon, and select an effect and position for the site message. Your selection here carries over to the “detailed” message
- Click “Message text” on the composer to create your site message. Clicking “Data attribute” lets you personalize the message and displays information specific to your contacts. Clicking “Emoji” lets you add an emoji to your message
- When finished, click “Save”
- Detailed message:
- Click the “Detailed Message” option at the top of the composer
- Click “Message Title” to give your message a name
- Click “Message text” to add your message. Here, you can insert personalization tags and emojis
- Click “Button text” to add text to your button. Note that you can align the text to the button's right, left, or center. If you don’t want to use a button, click the “X” to remove it
- As you hover over the message builder, you will notice an option to include images and additional buttons
- On the right pane, click the “Style” dropdown to choose “Pinned” or “Floating”
- When finished, click the “Save” button
- Initial message:
Sending multiple site messages
It is impossible to “pull back” a Site Message already sent to a contact. However, if you edit the site message that went out, the contact will receive the updated version of that message.
If a contact receives multiple Site Messages, they will appear “stacked” vertically until the contact dismisses them.